
Ever wondered how Google Photos is able to find your holiday pictures if you search for ‘beach’? Or how it finds your insta-worthy dinner snaps when you type ‘food’- without you ever having added a description or a label that says ‘food’? Well, behind that magic is Google’s machine learning capacity, trained on millions of images. But while Google’s algorithms can already do a lot, there’s always specific things that it may not yet know how to detect yet. So… what if I wanted to train my own algorithm to detect all kinds of food, like quatre-quart versus cupcakes ? Because, let’s face it, to the trained professional or your hungry 5-year old, there’s a world of difference.
For this blog post I did an experiment with Google Cloud’s AutoML product, to do just that: train my own image classification algorithm. Read on to see what results I got with just under 2 hours of effort put in.
The Vinyl Frontier
For my experiment, I used Google’s AutoML Vision API – an out-of-the-box, zero-code way to create your own custom models for image recognition & labelling. The use case I chose was this: my algorithm should be able to predict if an image featured a – hipster alert! – vinyl record and/or a turntable. So that means being it should be able to detect multiple objects (or “labels”) in 1 single image.
This is the expected result I had in mind:

Looks easy, right? So here’s the 5 steps in my journey to make it happen!
Step 1 – gather a set of example images
Your algorithm is a data-hungry beast, so it will need to be fed in order for it to produce anything significant. So your first step is easy: gather as many realistic example images that feature the objects or contexts that you want the model recognise.
To save time, here’s what I did: I used an image extraction extension for Google Chrome that lets you mass download all images on a specific site or web page: ImageAssistant Batch Downloader.
This is the result:

Then finally upload all those images to Google Cloud Platform. For this, log into the https://console.cloud.google.com/, choose VISION from the left menu and finally choose AutoML Vision – Image Classification.

Step 2 – Label your images
Once your images are uploaded in a new dataset, you can create labels and then assign them to your images, either one-by-one or by selecting multiple images and then assigning the correct label. For my experiment, although there are 3 logical “cases”, I only needed to 2 labels: “turntable” and “vinyl”.

Make sure you add enough images for each use case! I only used 80 images in total, of which 58 featured a turntable, and 50 featured a vinyl record. In terms of data science – that’s a ridiculously low number, but I wanted to see what kind of results I would get by slacking it 🙂
Also, make sure you add a good number of ‘difficult cases’:
- bad lighting and amateur shots
- partial visibility of the object your trying to label
- images from different angles
- wide variation (of turntable designs in my case, because some turntable models do not look like the stereotypical black hifi unit at all)
Step 3 – Train your model
Now here’s where it gets exciting. When you’ve labelled enough images, you can have a first go at training the model. Google will tell you – in the TRAIN tab in the interface – if you need to add more images before you can get good results:
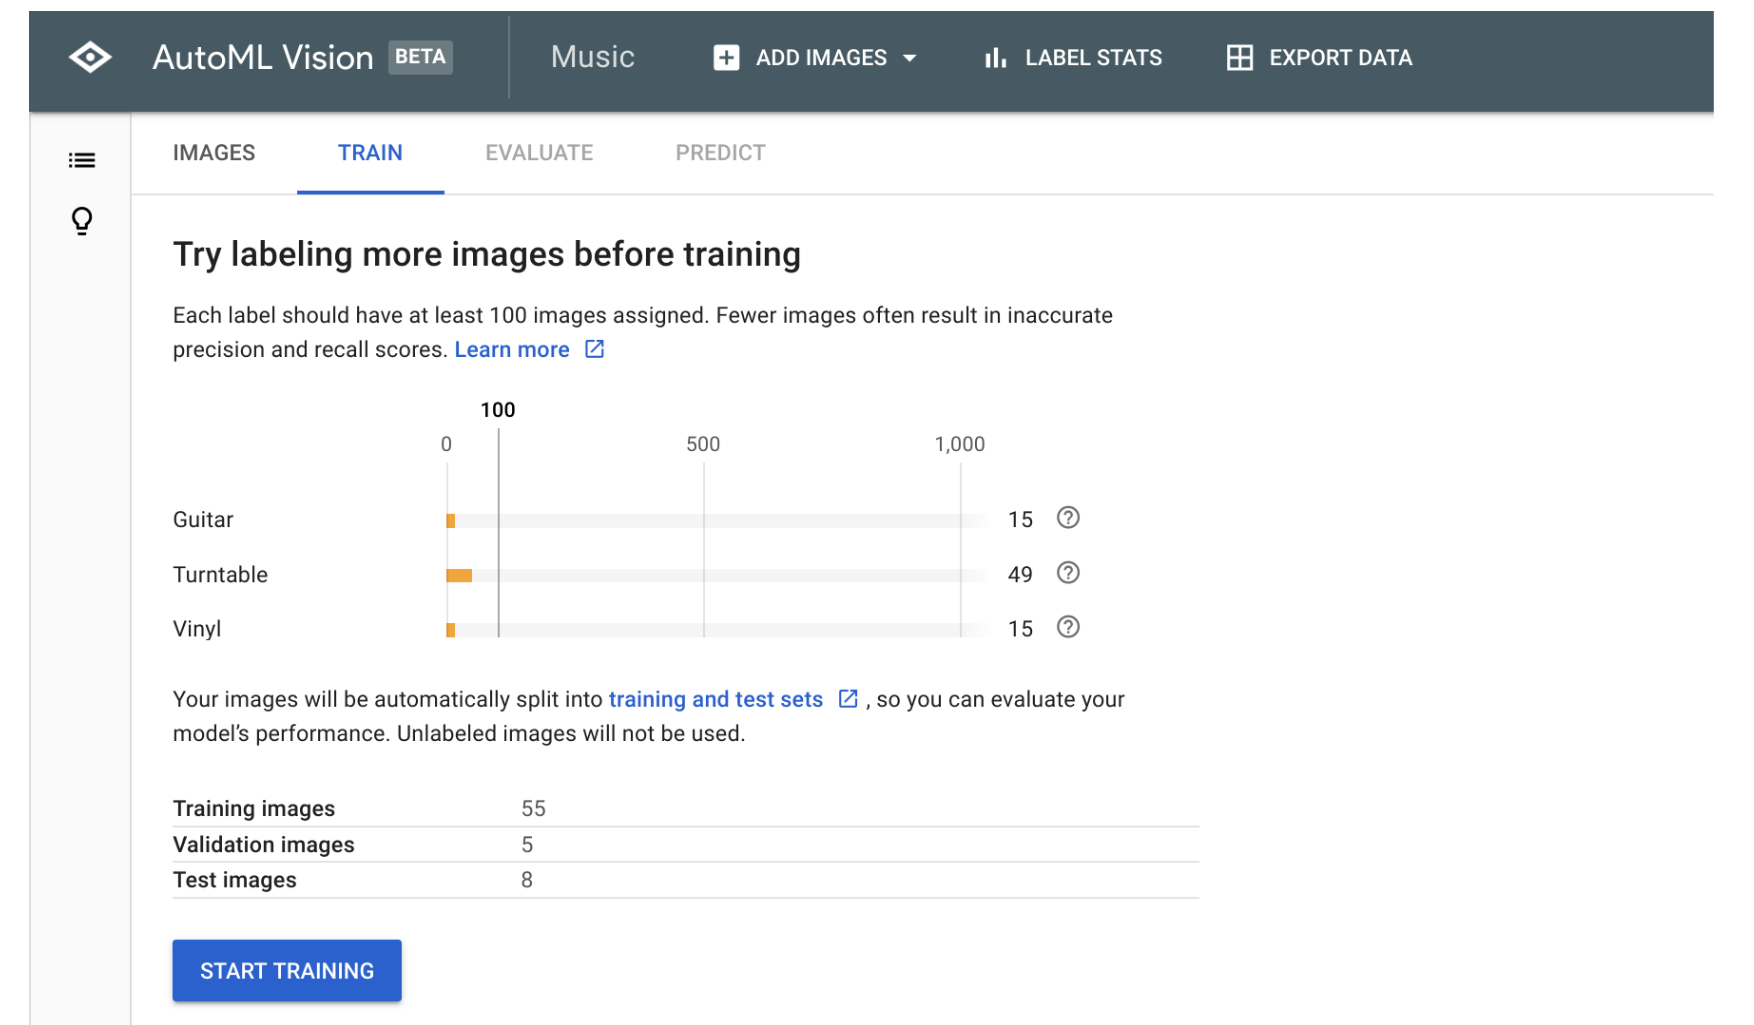
No need to put on sneakers for your training moment de gloire – just sit back with a coffee and click the blue Start Training button. Easy peasy.
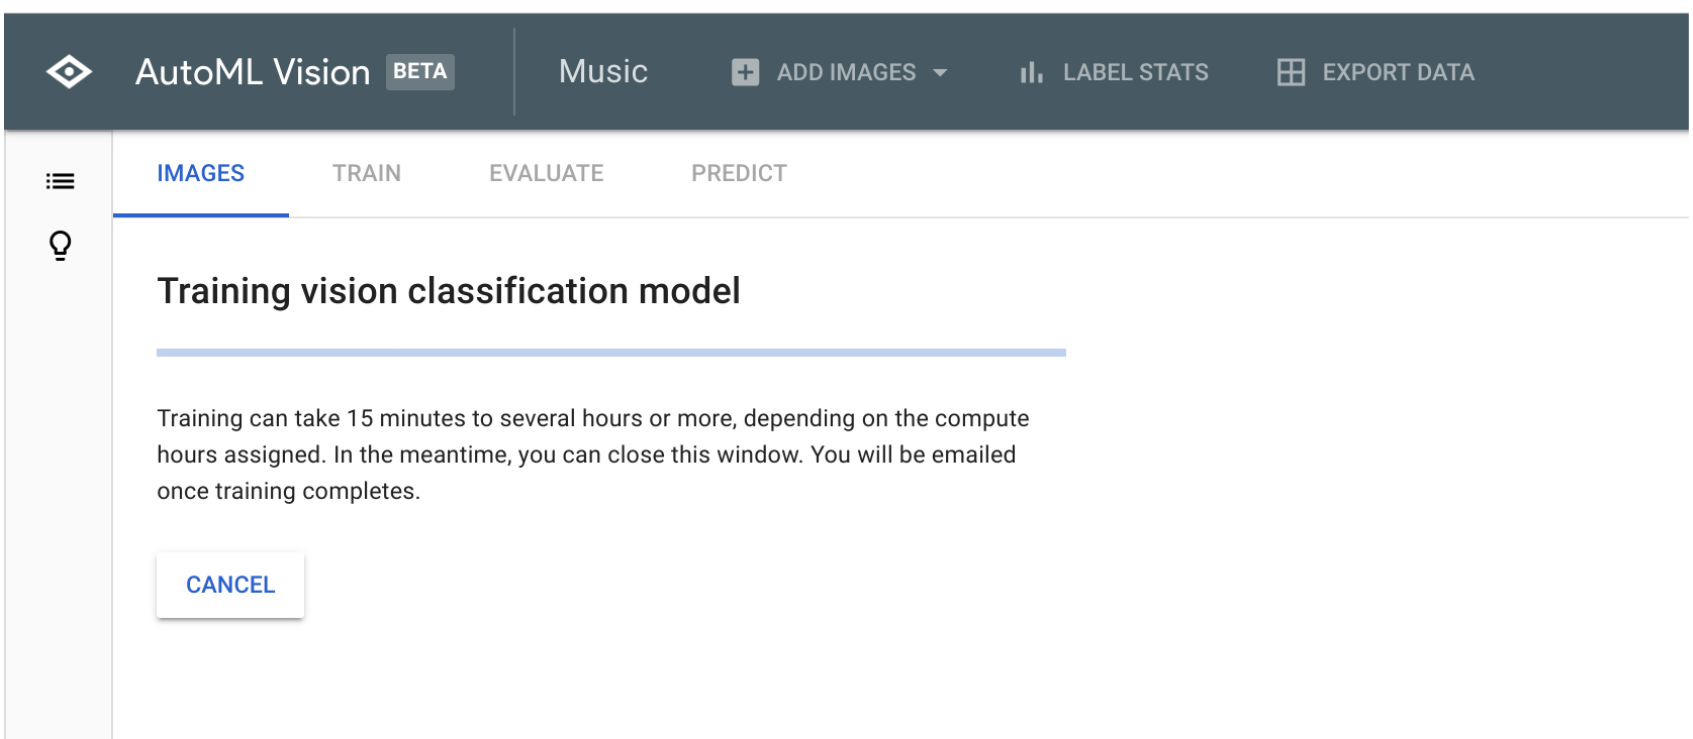
Google tells you it may take 15 minutes – and in my experience that’s indeed about the time it needed. You get notified by email when the training run is done.
Step 4 – Evaluate your model
When the training is done, it’s time to evaluate how well your model works. And if you did a good job at labelling, then the result of the training may look like this:
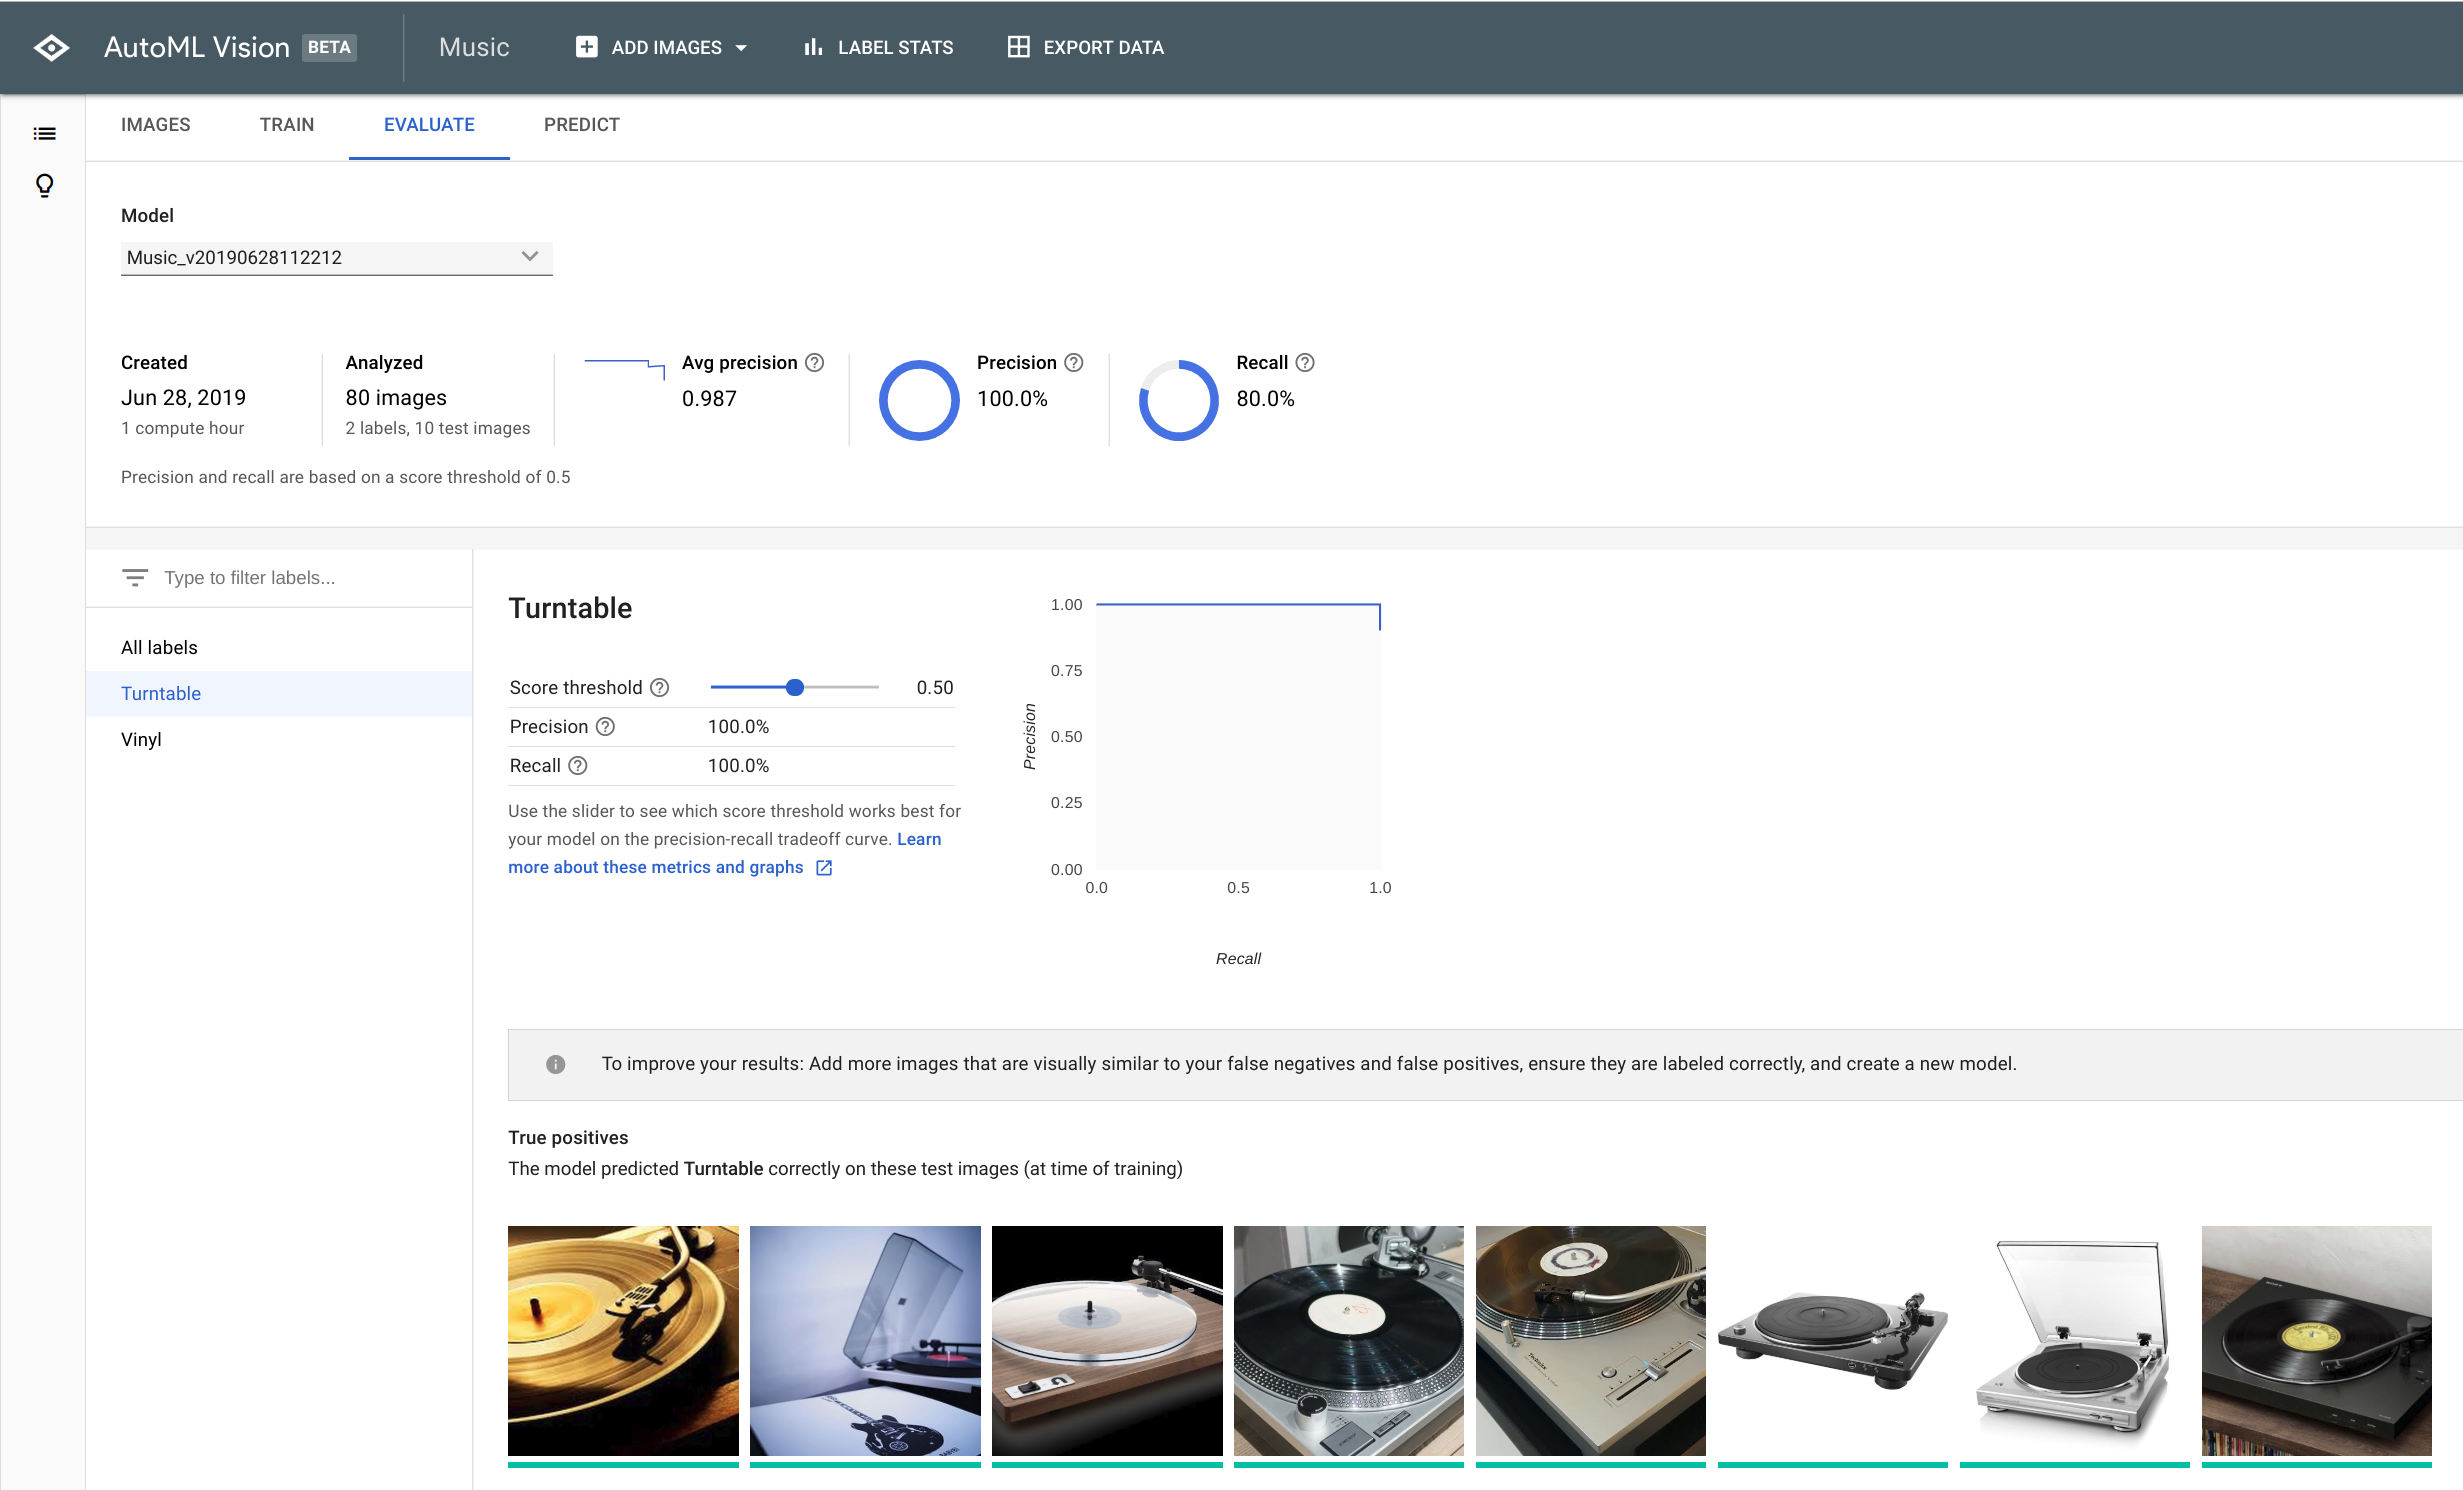
As you can see, there are two KPIs that indicate how well your model is performing:
- Precision
- Recall
Precision means: recognising fewer false positives (AKA: “Yeah! This is definitely a turntable” – when it’s actually not)
Recall means: recognising fewer false negatives (AKA: “No way this is a turntable!” – when it actually is a turntable).
If you’re not satisfied with the score of those two elements, you can play around with the threshold, which means you can tell the model to favour one over the other to a certain degree. I let my model run at the default 0.5 threshold (so: balanced between Precision & Recall).
Step 5 – use the model to predict the labels!
Now this is where you can see the results of your custom image classification algorithm in action! Simply upload a couple of images (that were NOT included in your training sets) and see how well the labels are detected.
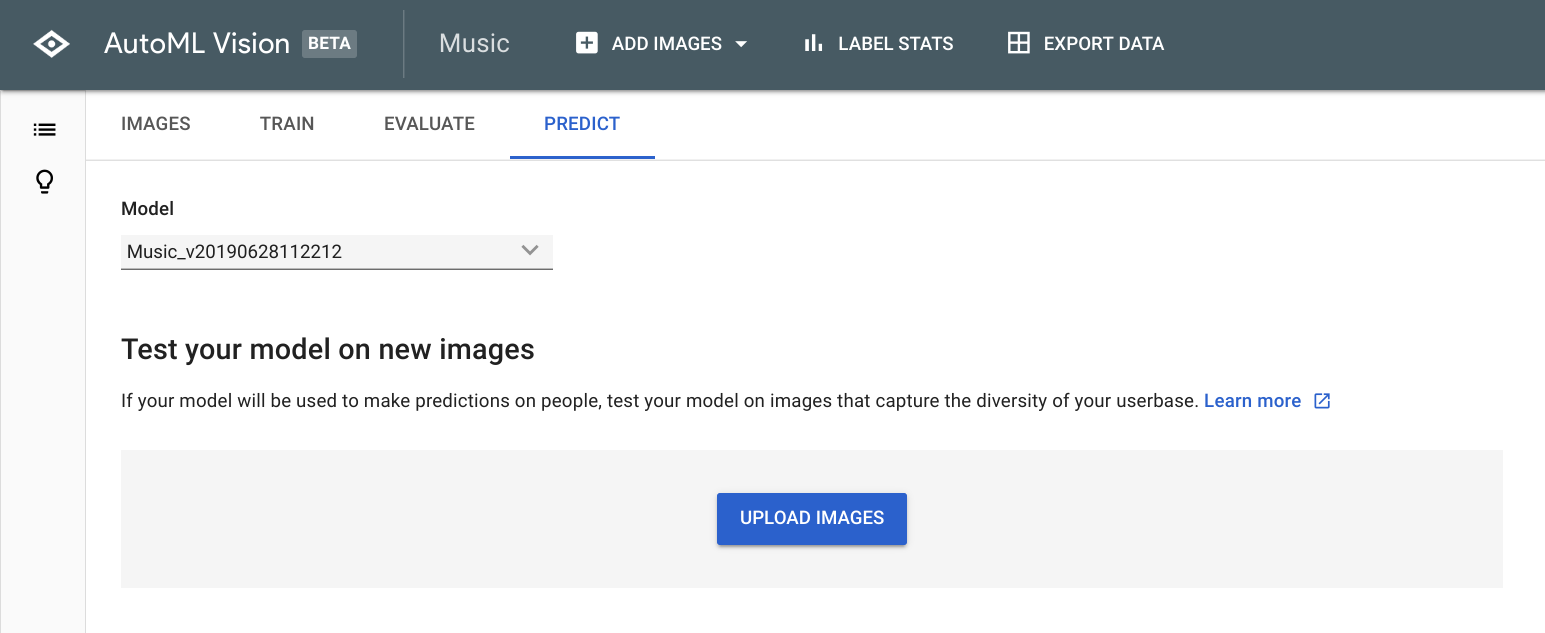
These are the results I got:.
It’s a record!
For this simple use case, you see that the model perfectly recognises the vinyl record with 0.998 certainty score (so almost 100% sure). The model also says it’s very, very unlikely that this image contains a turntable.

It’s a turntable!
Next image I tried is a low-resolution image of the classic Technics SL1200 – without a record on it. We can see the turntable prediction still works fine (0.996 certainty). However, my model falsely says there’s a vinyl record on the image (0.668 certainty).
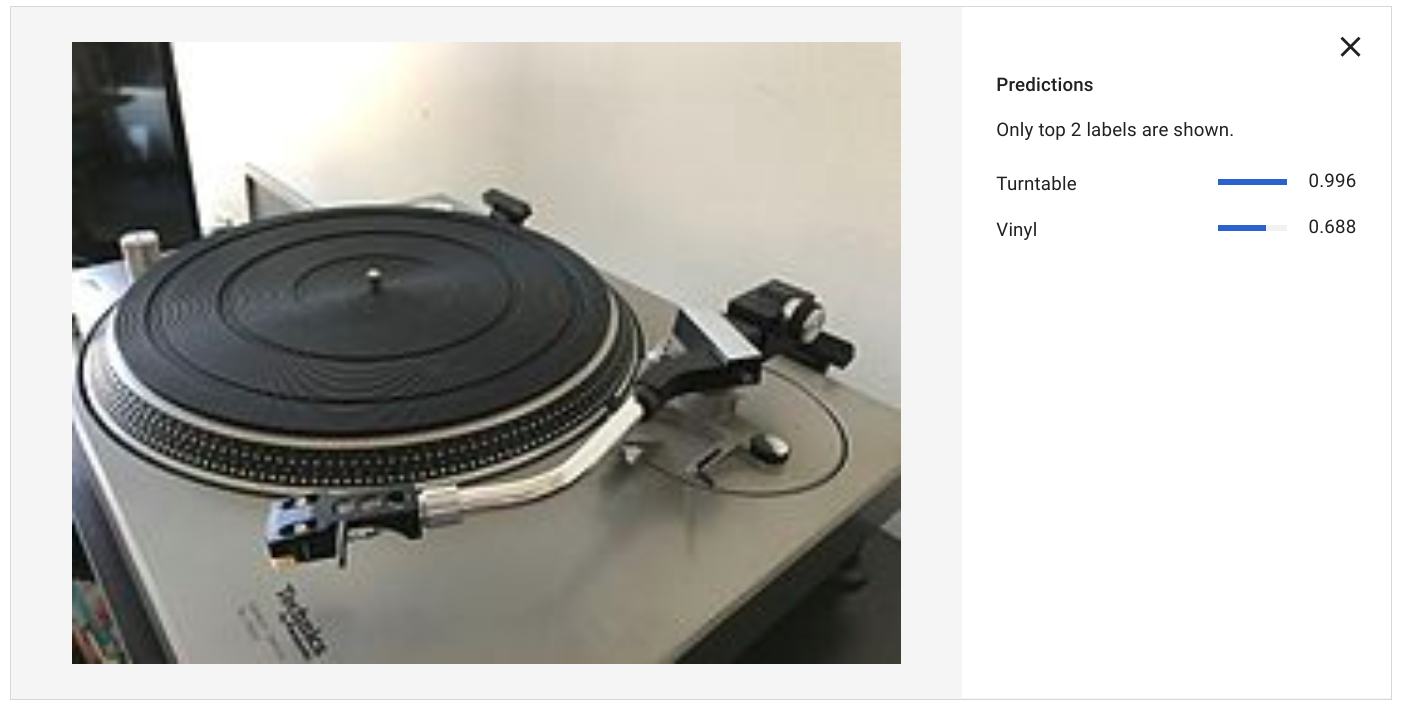
That’s a false positive for label “vinyl” that I would need to work on some more!
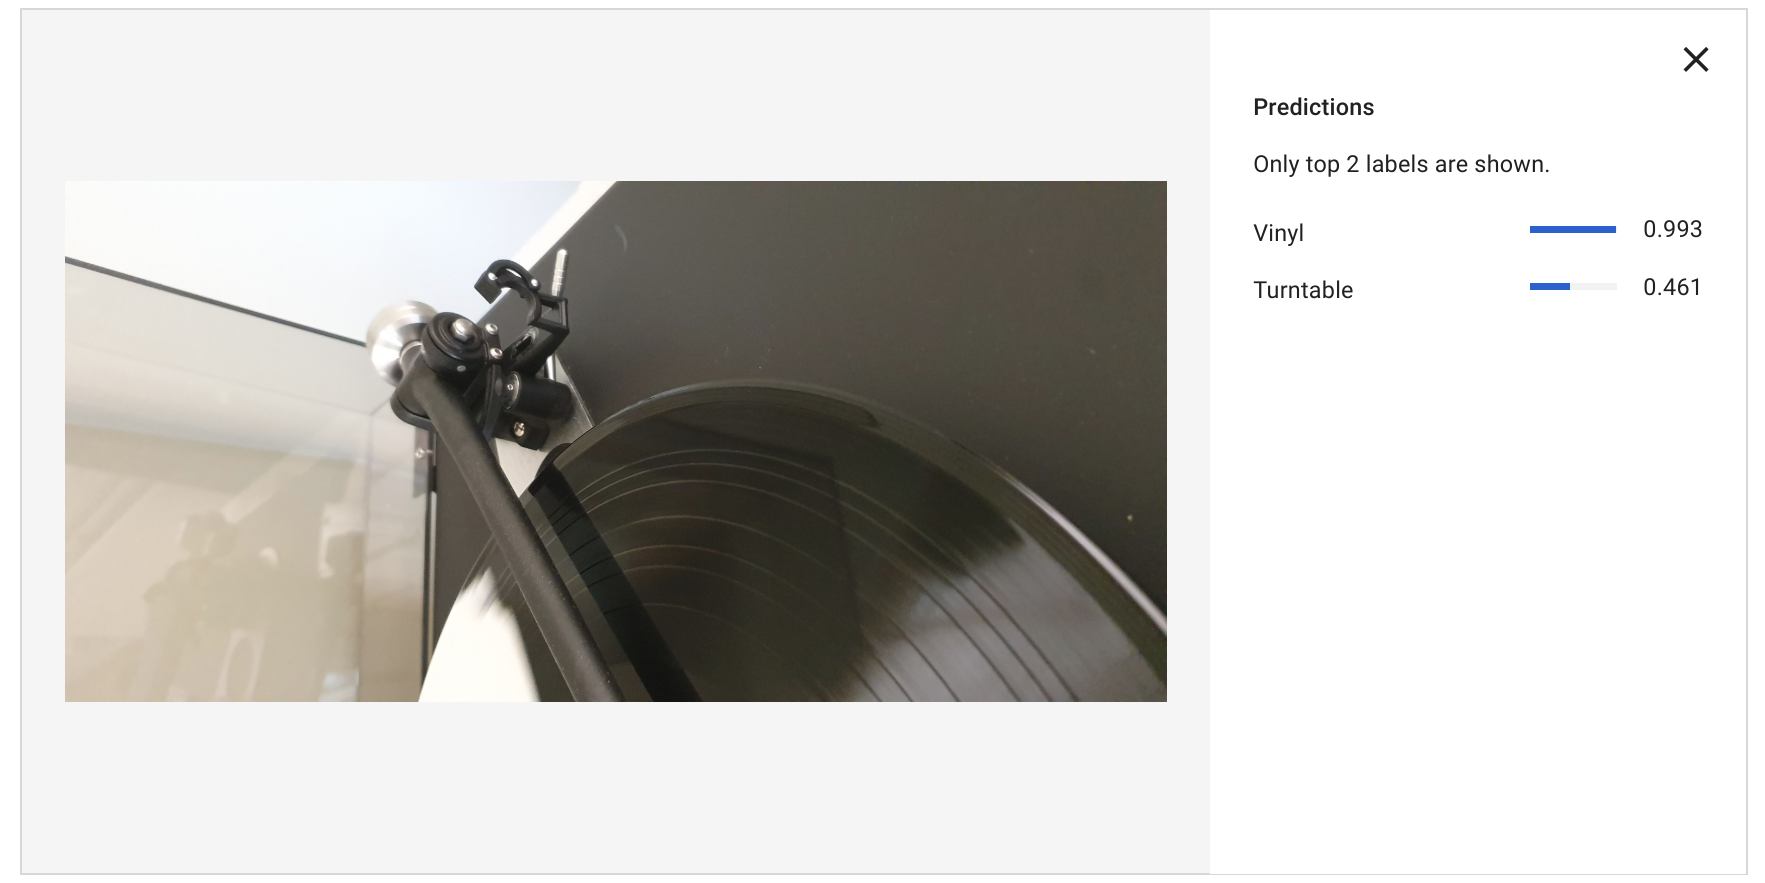
It’s a party!
And for the last test case, a more difficult situation: a partial image, featuring a turntable (arm) and a vinyl record playing. This time “vinyl” scores extremely well, and “turntable” scores a 0.461 certainty. Needs some work!
My 3 takeaways
First of all, it’s absolutely amazing that for a job like this – where previously (and I’m talking like 1 year ago) you would need to involve a data scientist and have 1000 x more labelled image data, you can now get a working model at almost no cost, investing only a couple of hours of your time and having decent results with under 100 images.
These are my 3 takeaways from my experiment with AutoML.
- AutoML Vision is a powerful way to get your hands on machine learning capacity without having to know the inner workings of how models are constructed and trained. It’s the democratisation of what Google believes should be at the core of every data or customer project.
- It’s a lot of fun to do, and extremely rewarding because you can get results from your business data and actually scale it to include it in your app or application, to add intelligence to your business processes (e.g. insurance claims with images of car damage) or just to gain insights from your consumers (e.g. “what clothing brands are my customers wearing?“).
- When doing this, while the model will work with only 100 images, it’s a small effort to carefully select them and pay more attention to false positives & false negatives (which I didn’t do). You can do this by adding images similar to the ones that didn’t work well when you trained your model, then label them correctly and finally retrain and test your new model.
So, how can you get value from AutoML, automated image labelling, classification & prediction in your business? Get in touch with us to explore the best & the fastest way to get value from your image data!

